As a content creator or online business owner, managing your own website is an essential part of your career. WordPress is the most popular content management system, with almost half of all websites on the internet created with it. WordPress allows you to create, edit, and manage your own website, with its interface being straightforward and easy to use. But have you ever wondered what all the buttons and features in the WordPress dashboard are for? Don’t worry, in this guide, we will help you navigate the WordPress Dashboard and provide you with a complete overview to help you manage your website without breaking a sweat.
1. Your Profile
When you first log into your WordPress account, the first thing you see is your dashboard and in the top right is your profile. Here you can edit basic information like your username, password, and name.

2. Settings
The Settings section lets you customize the specific settings for your website. This section is divided into several categories such as general, writing, reading, discussions, media, privacy, permalinks, and more.
You site Title, Tagline and URL are the first thing you should check and update. For instance, sometimes you might find that the URL is http:// and not https://. Updating this will log you out and might even crash your site if SSL i not already installed, so it’s best to ask your hosting for support to get this sorted.

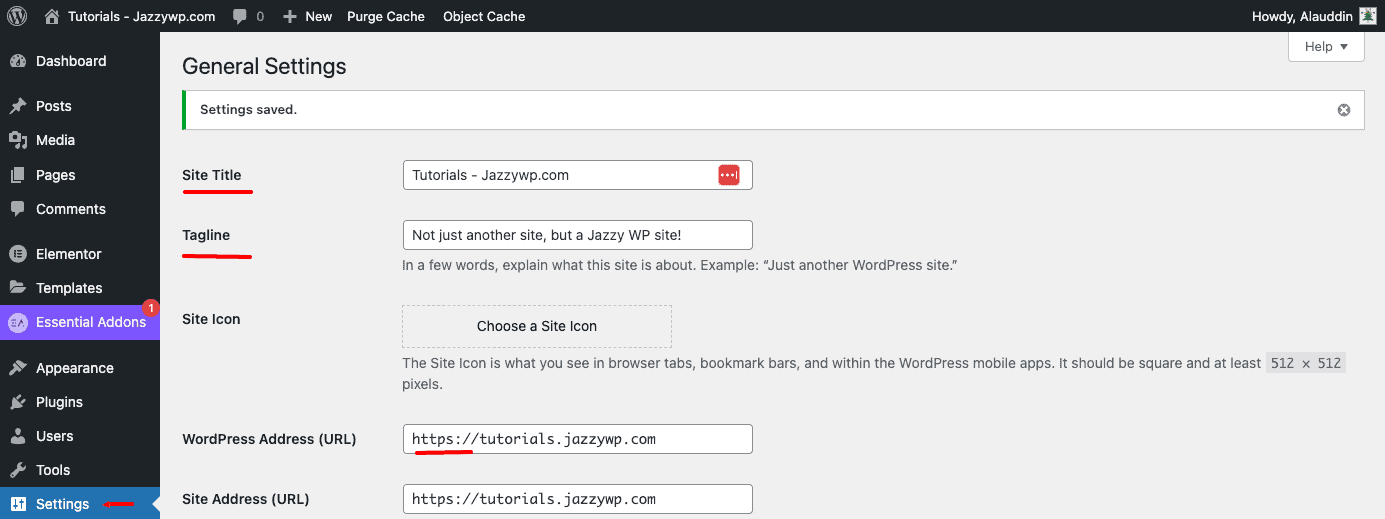
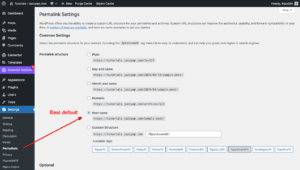
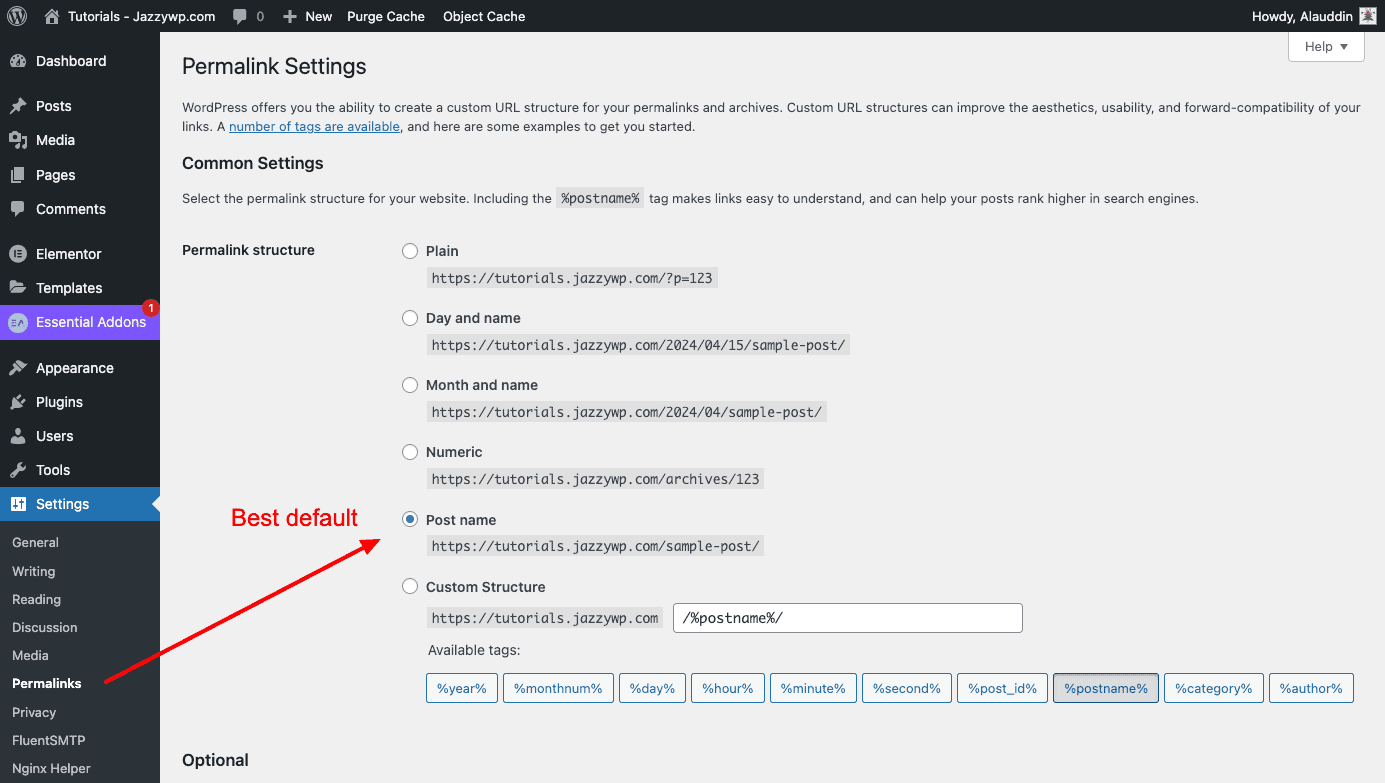
Note: Permalink setting is probably the next most important item you need to update to ensure your site is setup properly for Search Engines.
3. Discussion
The Discussion section deals with managing the comments and discussions that occur on your website. Moderation of comments can be handled automatically or manually, with options for blacklisting or whitelisting certain commenters, moderating comments, or enabling comments on articles. You can also set up email notifications to be notified when a new comment is posted.
4. Appearance
The Appearance section lets you customize the appearance of your website. In this section, you can apply or create custom themes, edit CSS, and make other visual customizations.
5. Content Types
- Pages
The Pages section is where you’ll manage and create pages on your website. This is different from the Posts section because the content in the Pages section will remain static, unlike the Posts section, which will have dynamic and chronological blog content. Pages can include things like “About Us,” “Contact Us,” and other static pages. The Pages section lets you manage all these pages and easily add new ones without disrupting the rest of your website’s structure. - Posts
The Posts section is where you’ll create and manage the blog or article content for your website. The Posts section allows you to create new posts, view already created posts, and make edits to them at any time. This section also includes categorizing and sub-categorizing which makes managing and finding the different types of posts much easier. - Media
The Media section is where you’ll manage any media content you wish to include on your website. This includes photos, videos, as well as audio and files. By going to the Media Library section, you’ll see all the files you’ve uploaded so far. By clicking on “Add New”, you can add new media content to your website. This is particularly useful if you have a lot of rich multimedia content you want to add to your site.
With this overview of the WordPress Dashboard, I hope it is now easier to manage your website and keep it up to date with fresh content.
Founder, Managing Partner of Jazzy Marketing.
My first foray into the web was back in 2001 when we needed to get a website build for a telecom venture I was working for. I was given the project of getting our website built with e-commerce integration for calling cards – a huge market at the time. Well, that was the spark that got me interested in website development and I have not looked back since.